

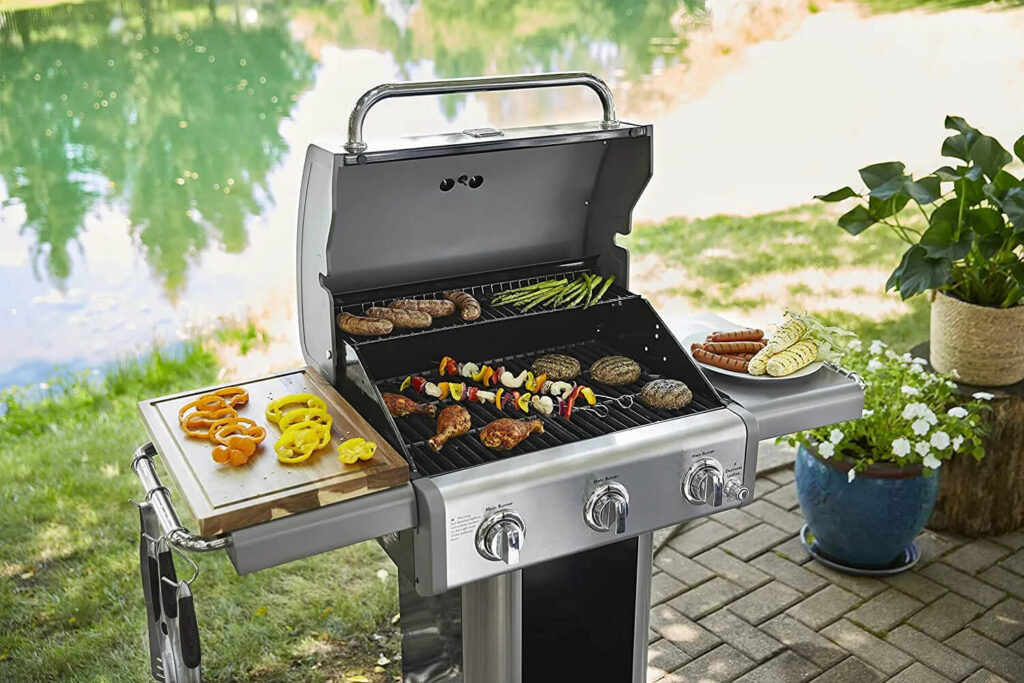
So, you’ve got your apron on, the scent of marinated meat is wafting through the air, and you’re all set for a barbecue bash. But, wait a minute – why is the grill not playing along? Fret not, grill aficionados; we’re diving into the nitty-gritty of addressing issues with a malfunctioning outdoor grill igniter.
The Igniter: A Small but Mighty Player
Before we get into the fixin’, let’s tip our hats to the unsung hero of your grilling escapades – the igniter. This little device, often overlooked until trouble comes knocking, is the spark (pun intended) that brings your grill to life. A malfunctioning igniter can turn your grilling fiesta into a frustrating fiasco.
The Backyard Drama Unfolds
Picture this: you’ve invited friends over for a Brooklyn backyard barbecue, and your grill decides to go on strike. The igniter refuses to dance with the flames, leaving you scratching your head in disbelief. What could be the culprit behind this backyard drama?
Common Culprits Behind Igniter Meltdowns
Now, let’s get down to the nitty-gritty. Why does your igniter act like it’s been stood up on a date? Here are a few usual suspects:
- Battery Blues: Is the power running low, or have your batteries waved the white flag?
- Dirty Dancing Electrode: Could grease and grime be ruining the electrode’s dance moves?
- Wiring Woes: Are the wires playing hide-and-seek or just tangled up in a messy tango?
- Gas Games: Is the gas flow on lockdown, leaving your grill in a fiery rebellion?
In the heart of Brooklyn, New York where rooftop gatherings and backyard barbecues define summer, a malfunctioning igniter is akin to rain on a parade. As the sun sets over the cityscape, you want your grill to sizzle, not fizzle.
Understanding the Outdoor Grill Igniter
Now that we’ve set the stage, let’s peek under the hood of your grill’s ignition system. Understanding the components is like knowing the cast of characters in your favorite blockbuster – each plays a crucial role.
Components of a Typical Outdoor Grill Igniter System
| Component | Function |
| Ignition Module | The brain of the operation, generating sparks |
| Electrode | The matchmaker, creating sparks to ignite gas |
| Wiring | The backstage crew, connecting the ensemble |
| Battery/Power Source | The power player, supplying energy for sparks |
The Ignition Process: A Sparky Affair:
- Spark Generation: The ignition module kicks off the show by generating high-voltage sparks.
- Gas Flow and Ignition: The electrode catches the sparks and ignites the gas, turning your grill into a flame-kissed wonderland.
Now that we’ve demystified the players and their roles, let’s delve into the signs that your ignition system is staging a rebellion.
Identifying Signs of Igniter Malfunction
Grill not lighting up? Igniter giving you the silent treatment? Here’s how to read the signs of a malfunctioning igniter:
- Failure to Produce Sparks:
- Symptoms: Dead silence when you turn the knob.
- Diagnosis: Potential issues with the ignition module or power source.
- Uneven or Delayed Ignition:
- Symptoms: A hesitant flame or uneven ignition.
- Diagnosis: Electrode misalignment or dirt hindering the spark’s path.
- Inconsistent Flame or Failure to Ignite:
- Symptoms: Sparks fly, but the flame fizzles or refuses to ignite.
- Diagnosis: Check gas supply, ensuring the valve is wide open, and inspect for blockages in the gas lines.
Visual Inspection: The Sherlock Holmes Approach
Grab your magnifying glass (or just keen eyes) and visually inspect the igniter components. Look for loose connections, damaged wires, or any foreign substances that might be gate-crashing the ignition party.
With these telltale signs at your fingertips, you’re ready to embark on the journey of troubleshooting your rebellious igniter. Stay tuned for the next act, where we unravel the secrets of reviving your grill’s spark.
Troubleshooting Steps
So, your grill’s igniter is throwing a tantrum, and the backyard barbecue dream hangs in the balance. Fear not, fellow grill enthusiasts! We’re diving headfirst into the troubleshooting labyrinth to reignite that spark.
Safety Precautions: First Things First
Before we unleash our inner grill whisperer, let’s lay down some ground rules to ensure a safe troubleshooting expedition:
- Turn Off the Gas Supply: Safety first! Shut off the gas supply to prevent any unexpected flare-ups during troubleshooting.
- Ensure Proper Ventilation: Don’t play with fire in a confined space. Make sure your grilling haven has adequate ventilation.
Check the Battery or Power Source
Is your igniter feeling a bit powerless? Let’s kick off with the heart of the ignition system – the battery or power source.
Testing and Replacing Batteries:
- Grab a Multimeter: Measure the battery voltage with a multimeter. Low readings could indicate a dying battery.
- Replace if Necessary: If the voltage is on life support, swap out the batteries with a fresh set.
Inspecting Electrical Connections:
- Tighten Loose Connections: Ensure all wiring and connections are snug and secure.
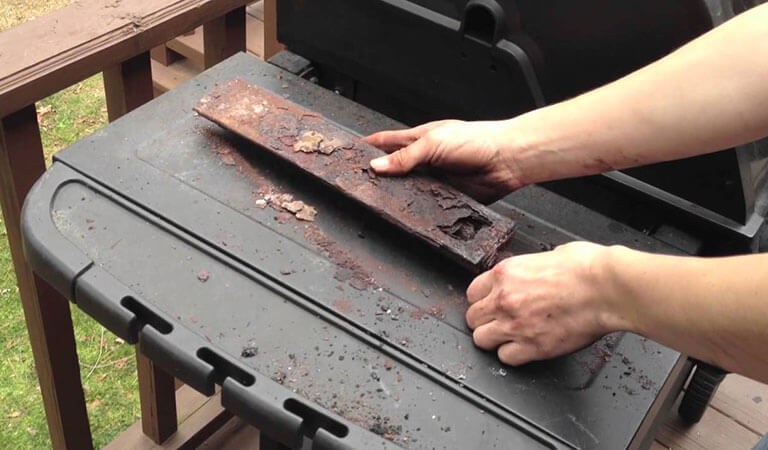
- Inspect for Corrosion: Corroded terminals? Clean them with a wire brush for a better electrical handshake.
Inspecting and Cleaning the Electrode
Time to give your electrode some TLC. It may be the cupid of the grilling world, but even cupids need a cleanup.
Removing Dirt, Grease, and Debris:
- Turn Off Gas Supply: Safety dance! Switch off the gas supply before meddling with the electrode.
- Gentle Scrubbing: Use a soft brush or cloth to delicately remove dirt and grease from the electrode.
Verifying Electrode Alignment:
- Adjust if Needed: Ensure the electrode is properly aligned with the burner. Misalignment can lead to a romantic spark gone awry.
Testing the Ignition Module
The ignition module is the maestro orchestrating the symphony of sparks. Let’s make sure it’s not playing out of tune.
Checking for Loose Connections:
- Inspect Wiring: Look for loose or disconnected wires. A snug fit is the key to a harmonious spark ensemble.
- Secure Connections: Tighten any loose connections to the ignition module.
Using a Multimeter for Voltage Testing:
- Multimeter Magic: Measure the voltage output from the ignition module. Inconsistent readings may hint at a faulty module.
- Replacement Time: If the numbers don’t add up, consider replacing the ignition module.
Verifying the Gas Supply
The gas is the fuel for the grilling fire, and a hiccup in supply can douse your culinary ambitions.
Ensuring the Gas Valve is Open:
- Check Valve Position: Confirm that the gas valve is fully open. A partially closed valve can starve the burners.
Inspecting the Gas Lines for Blockages:
- Visual Inspection: Examine the gas lines for any blockages. Clear any obstructions that might be playing spoilsport.
With these troubleshooting steps, you’ve embarked on the journey to reclaim your grill’s glory. If the basic steps don’t rekindle the flame, fear not – we’ll explore advanced troubleshooting in the next chapter. Stay tuned, grill gurus!
Advanced Troubleshooting
So, you’ve sailed through the basic troubleshooting like a seasoned captain, but the stubborn igniter still refuses to bow to your command. Fear not, intrepid grillmaster! We’re venturing into the advanced seas to uncover the hidden mysteries behind malfunctioning igniters.
Checking for a Faulty Ignition Switch
The ignition switch is the gatekeeper to the ignition kingdom. If it’s playing hard to get, let’s investigate:
- Inspection Time: Examine the ignition switch for damage or irregularities.
- Multimeter Test: Conduct a multimeter test to ensure the switch is sending the right signals.
Examining the Gas Regulator and Pressure
Sometimes, the pressure is on, but not in a good way. Let’s peek at the gas regulator:
- Pressure Check: Ensure the gas regulator is maintaining the correct pressure.
- Regulator Replacement: If the pressure is amiss, consider replacing the gas regulator.
Inspecting the Control Panel and Wiring
The control panel is the command center, and the wiring is its nervous system. Let’s scrutinize both:
Control Panel Examination:
- Visual Check: Look for any signs of damage or wear on the control panel.
- Button Test: Ensure all buttons on the control panel are responsive.
Wiring Inspection:
- Check for Wear: Inspect the wiring for any signs of wear, fraying, or damage.
- Tighten Connections: Tighten any loose connections within the wiring.
Seeking Professional Assistance
If, despite your valiant efforts, the igniter still refuses to cooperate, it’s time to bring in the cavalry:
- Professional Grill Doctor: Contact a professional grill technician to diagnose and remedy the issue.
- Manufacturer’s Support: Reach out to the grill manufacturer’s customer support for expert guidance.
By delving into these advanced troubleshooting measures, you’re tackling igniter issues with the finesse of a seasoned pitmaster. Your grill will soon be back in action, unleashing the flames for your culinary escapades.
Preventive Maintenance
Now that you’ve conquered the igniter dragon, let’s talk about ensuring a future free from ignition woes. Prevention is the name of the game.
Regular Cleaning and Inspection of Igniter Components
- Scheduled Scrubbing: Set a routine for cleaning the electrode and surrounding components.
- Grease Patrol: Regularly clean and degrease the ignition module and wiring.
Protecting the Igniter from Weather Elements
- Cover-up Routine: Invest in a high-quality grill cover to shield the igniter from rain, snow, and harsh sunlight.
- Seasonal Checkup: Before each grilling season, inspect the igniter components for any wear or damage.
Following Manufacturer’s Guidelines for Usage and Maintenance
- Manual Matters: Stick to the manufacturer’s guidelines for usage, cleaning, and maintenance.
- Proactive Measures: Implement any preventive measures recommended in the grill manual.
With these preventive steps, you’re not just fixing issues; you’re ensuring they stay fixed. Your grill will be the star of the show, lighting up your barbecue adventures for seasons to come. Stay grilling, my friends!
Fired Up and Ready to Grill!
As you fire up your grill, remember: a well-maintained igniter is the key to unlocking the gates of grilling paradise. Whether you’re a weekend warrior or a seasoned pitmaster, the knowledge you’ve gained today ensures that your grilling escapades will be filled with flavor, flair, and uninterrupted flames.
So, go ahead, throw those marinated masterpieces on the grates, and let the igniter spark the beginning of yet another culinary adventure. May your grill always be lit, and your meals forever delicious! Happy grilling!
Frequently Asked Questions (FAQ)
Q1: Why won’t my grill ignite?
A: Several factors could contribute to ignition issues. Check the battery, electrode alignment, and wiring for any faults. Ensure the gas valve is open, and the gas lines are clear. If the problem persists, consult the troubleshooting guide for a step-by-step solution.
Q2: How often should I clean the igniter components?
A: Regular maintenance is key. Clean the electrode and surrounding components after each use to prevent dirt and grease buildup. A more thorough inspection and cleaning routine can be performed seasonally for optimal performance.
Q3: Can I use rechargeable batteries for my grill igniter?
A: While it’s technically possible, it’s recommended to use high-quality alkaline batteries for consistent performance. Rechargeable batteries may not provide the required voltage for a reliable spark.
Q4: What do I do if the igniter sparks but the grill doesn’t ignite?
A: This could indicate a gas flow issue. Check the gas valve for proper opening and inspect the gas lines for any blockages. Ensure the burners are clean and free from obstructions.
Q5: Is it safe to troubleshoot the igniter myself?
A: Yes, but safety first! Always turn off the gas supply before troubleshooting, and ensure proper ventilation. If you’re unsure or the issue persists, seek professional assistance.
Q6: How do I know if my ignition switch is faulty?
A: Inspect the ignition switch for damage or irregularities. Conduct a multimeter test to ensure it’s sending the correct signals. If in doubt, consult the advanced troubleshooting section for further guidance.
Q7: Can I replace the igniter components myself?
A: Basic components like batteries and electrodes can be replaced by users. However, for more complex parts like ignition modules or switches, it’s advisable to seek professional assistance or follow the manufacturer’s guidelines.
Q8: Are there preventive measures to avoid future ignition issues?
A: Absolutely! Follow a regular cleaning schedule for igniter components, protect the grill with a cover, and adhere to the manufacturer’s guidelines for usage and maintenance. These preventive measures will keep your igniter in top condition.
Q9: What should I do if the igniter still doesn’t work after troubleshooting?
A: If basic troubleshooting fails, consult the advanced troubleshooting section. If the issue persists, it’s time to call in a professional grill technician or reach out to the manufacturer’s customer support for expert assistance.
Q10: Can weather conditions affect the igniter’s performance?
A: Yes, exposure to harsh weather elements can impact the igniter’s performance. Use a high-quality grill cover to protect the igniter from rain, snow, and sunlight, ensuring its longevity and consistent functionality.